8 Best Blowout Low Taper Fade Curly Hair for Men in 2025
Have you ever caught yourself staring in the mirror, running your fingers through your curly locks, and wondering how to give them that perfect edge? Trust me, I’ve been there. As someone blessed (and sometimes cursed) with a head full of curls, I know the struggle of finding that perfect hairstyle that’s both stylish and manageable. That’s why I’m excited to share my personal journey with the blowout low taper fade for curly hair – a game-changer that might just revolutionize your look too.
Types of Blowout Low Taper Fade Curly Hair
Let’s face it, curly hair can be a handful. One day it’s bouncy and beautiful, the next it’s a frizzy mess. I remember countless mornings spent battling my unruly mane, trying every product and technique under the sun. It wasn’t until I discovered the blowout low taper fade that I finally felt in control of my curls.
But here’s the kicker – mastering this style isn’t just about looking good. It’s about feeling confident, expressing yourself, and embracing your natural texture while still keeping things fresh and modern. Stick with me, and I’ll show you how this versatile cut can transform not just your hair, but your entire vibe.
The Curly Hair Conundrum
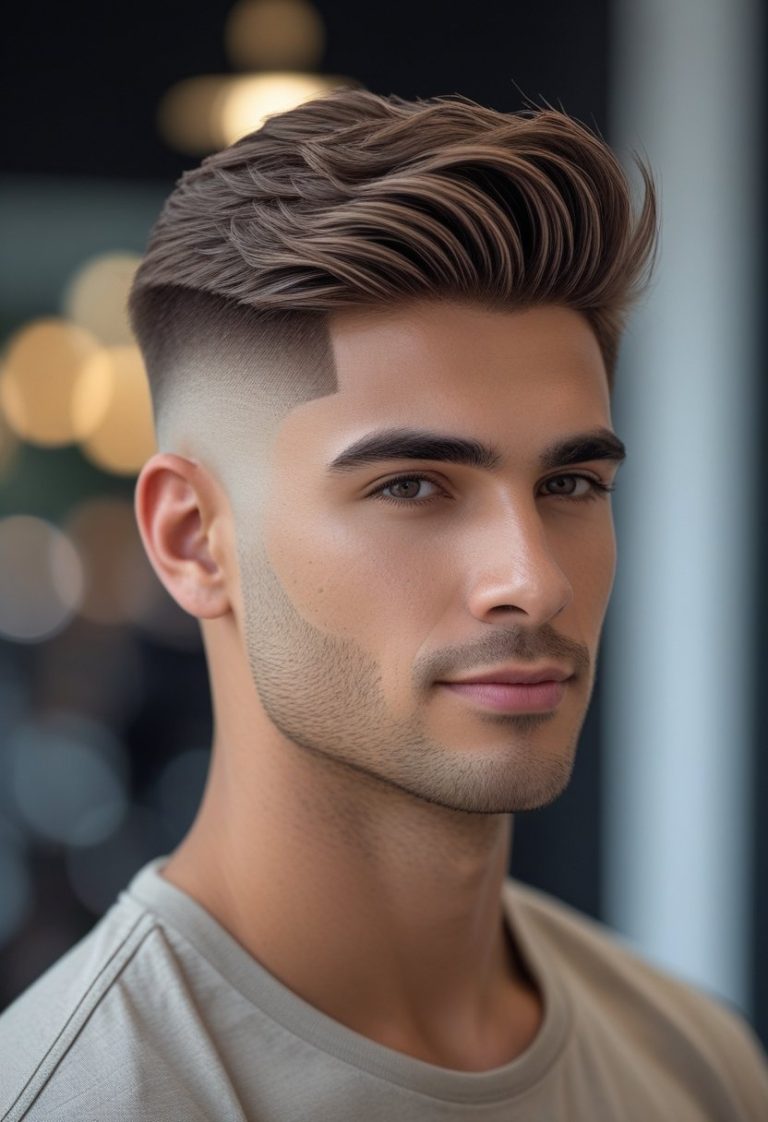
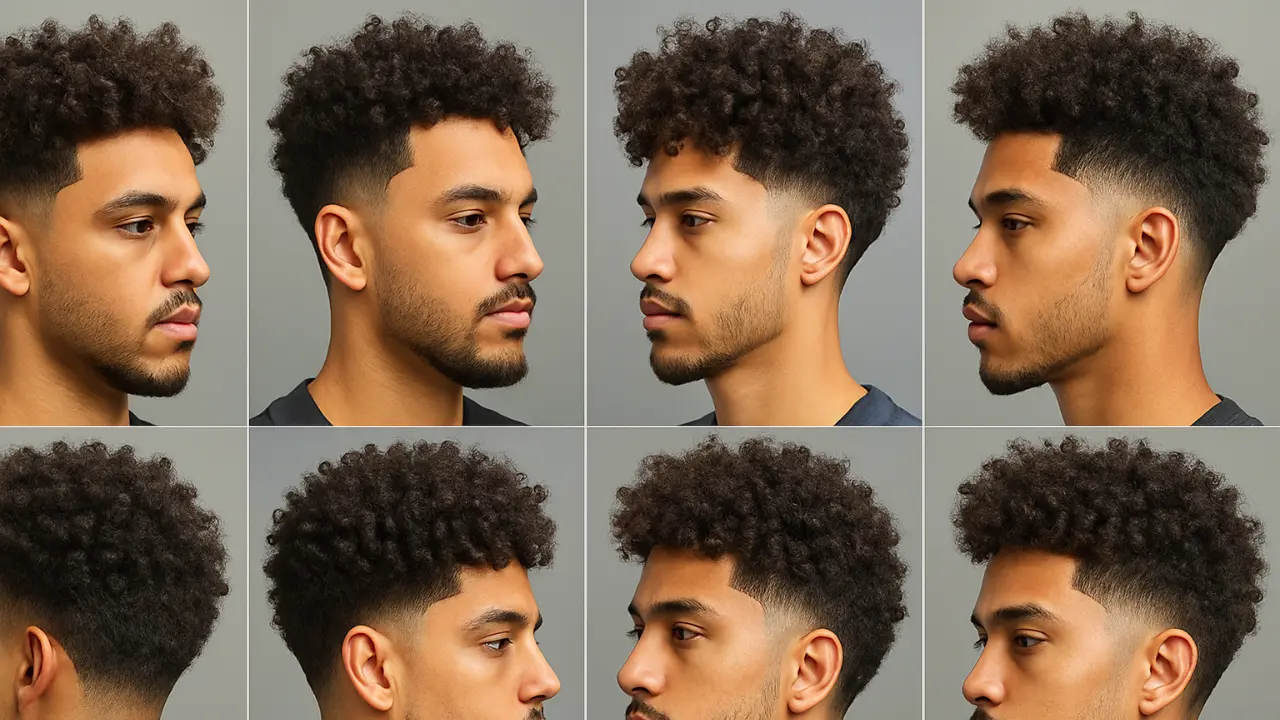
1. Classic Blowout with Low Taper Fade
This foundational cut leaves the curly top natural and voluminous, styled outward using a blow-dryer or curl sponge, while the sides and neckline feature a soft low taper fade. The fade keeps the look structured while allowing the curls to shine on top.
This version is perfect for men who love big curls with clean outlines. It works for tight coils or loose ringlets, offering a modern style that’s both manageable and attention-grabbing. The result is a well-rounded silhouette with a bold crown and a refined edge.
2. Sponge Curl Blowout with Low Taper Fade
Here, the curls are defined using a sponge or twist brush to create a coiled, tight texture at the top, enhanced by a low taper around the ears and nape. The contrast between the structured sides and the textured crown gives this style an edgy finish.
This cut is best for men with short to medium curls. It provides that “just styled” appearance while remaining low-maintenance. Pair it with a line-up or temple fade detail for an even sharper look.
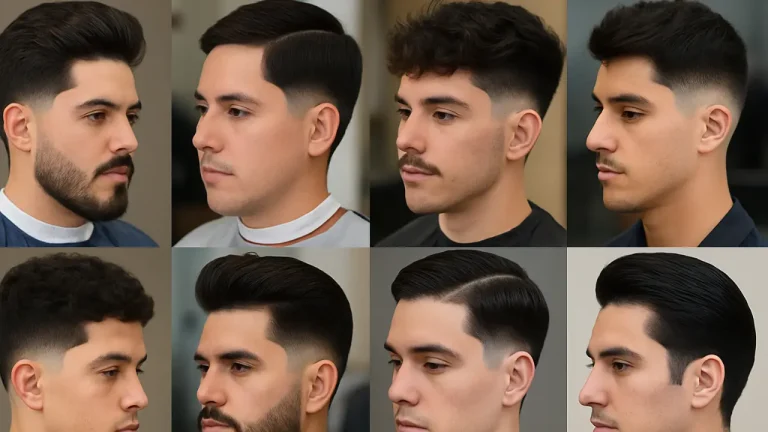
3. Blowout Low Taper Fade with Beard Blend
In this style, the curly blowout top connects smoothly with a well-groomed beard through a clean low taper fade on the sides. The fade doesn’t just serve the hairstyle — it frames the entire face and adds a sense of symmetry.
This style suits men with fuller facial hair who want a complete and cohesive look. The curly volume on top adds youthfulness and energy, while the taper and beard blend bring maturity and structure.
4. Curly Blowout with Drop Taper Fade
This version drops the taper fade lower toward the back of the head, following the natural curve of the skull. The curly top remains full and textured, while the fade hugs the shape of the head more closely than a straight fade.
This variation provides a more tailored and sculpted effect. It’s ideal for enhancing head shape, especially for men with round or oval faces. The drop taper adds a sense of flow from top to neckline, giving the style a fluid and polished finish.
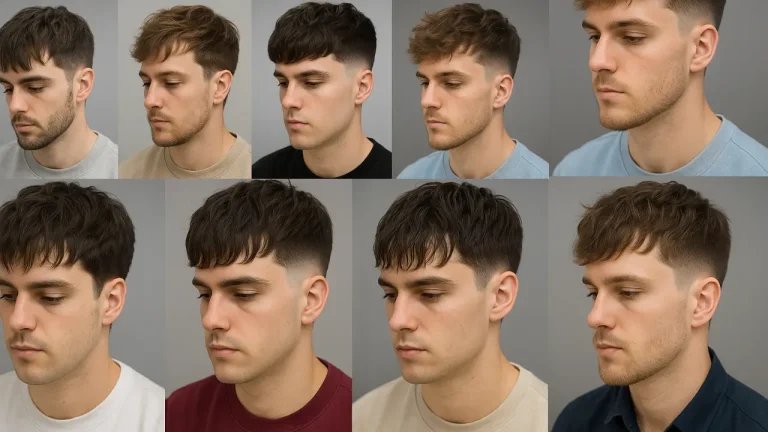
5. Mid-Length Curly Blowout with Low Taper
For those with longer curls, this cut leaves 4–6 inches of curly volume at the crown while keeping the sides tightly faded from the temples downward. The taper ensures the sides don’t balloon out, maintaining a balanced and tidy silhouette.
This cut is expressive and bold but still wearable. It suits artistic, outgoing personalities and offers plenty of versatility for styling — whether you want to fluff it out, push it to the side, or let it fall naturally.
6. Blowout Afro with Low Taper Fade
This variation keeps the top rounded and full, embracing the afro shape while the taper fade cleans up the sides and neckline. The blowout technique is used to lift and shape the curls for a perfect dome effect.
It’s an excellent choice for men with dense curls or coiled hair who want a clean but natural look. The low taper adds elegance to the afro without sacrificing volume, making it great for everything from streetwear to formal attire.
7. Curly Mohawk Blowout with Low Taper Sides
This bold version keeps the curls raised through the center like a mohawk while tapering the sides low to blend into the skin. The back may be shaped tight or slightly fuller, depending on your preferred profile.
This style suits men with tighter curl patterns who want a standout look that still feels structured. It’s confident, expressive, and makes great use of natural texture while keeping the outline refined.
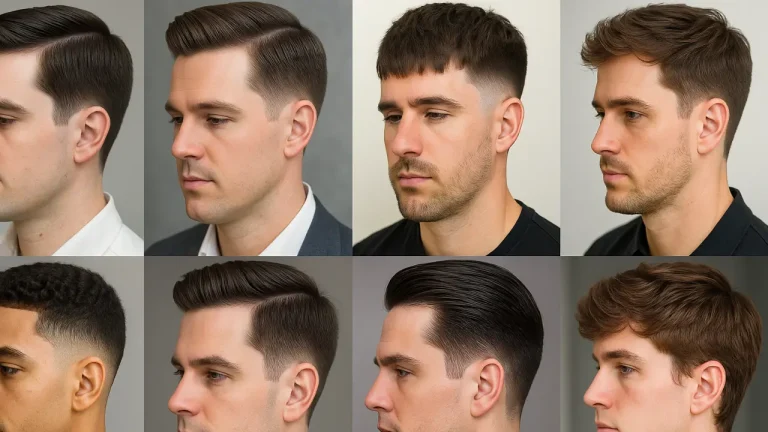
8. Temple-Focused Blowout with Low Taper
This cut emphasizes the temples and sideburns with a sharper taper, while the rest of the fade remains subtle. The blowout curls are left thick and dense on top, but the sharper temple area adds extra definition to the face.
It’s a fresh, fashion-forward style for guys who want something eye-catching without going overboard. The temple focus draws attention to the eyes and jawline, complementing well-shaped facial hair or accessories like earrings or glasses
Understanding the Blowout Low Taper Fade
Before we dive into the nitty-gritty, let’s break down what exactly a blowout low taper fade for curly hair entails. It’s a fusion of several popular styles, each bringing something unique to the table:
When combined, these elements create a stylish, low-maintenance look that works wonders for curly hair. But achieving this style isn’t just about the cut – it’s about the technique, the products, and the aftercare.
Perfect Blowout Low Taper Fade
The Awkward Beginning
I’ll never forget my first attempt at a blowout low taper fade. Picture this: me, standing in front of my bathroom mirror, armed with a blow dryer and a round brush, determined to tame my curls into submission. Let’s just say it didn’t go as planned. My hair ended up looking more like a frizzy mushroom cloud than the sleek style I was aiming for.
But you know what? That initial failure taught me something crucial – technique matters. A lot.
The Game-Changing Discovery
After that disastrous first attempt, I knew I needed help. I booked an appointment with a stylist who specialized in curly hair, and that’s when everything changed. As I sat in the chair, watching her work her magic, I realized there was so much more to this style than I’d initially thought.
She taught me about:
It was like a light bulb went off in my head. Suddenly, the blowout low taper fade wasn’t just a haircut – it was an art form.
How to Choose the Best Blowout Low Taper Fade for Your Curly Hair
Now that I’ve shared my journey, let’s talk about how you can choose the best blowout low taper fade for your unique curls. Because trust me, not all curls are created equal, and what works for me might not work for you.
Assess Your Curl Type
First things first – you need to understand your curl type. Are we talking tight coils, loose waves, or something in between? Your curl pattern will play a big role in determining how your blowout low taper fade will look and how much maintenance it’ll require.
Consider Your Face Shape
Next up, think about your face shape. The beauty of the blowout low taper fade is that it can be customized to flatter any face shape. Here’s a quick guide:
Factor in Your Lifestyle
Be honest with yourself – how much time are you willing to spend on your hair each day? If you’re always on the go, you might want to opt for a shorter style that requires less maintenance. On the other hand, if you enjoy spending time on your grooming routine, you can go for a longer, more dramatic look.
The Step-by-Step Guide for Perfect Blowout Low Taper Fade
Alright, now for the moment you’ve been waiting for – let’s break down how to actually achieve this killer style.
Step 1: Start with Clean, Conditioned Hair
Always begin with freshly washed and conditioned hair. Use products specifically designed for curly hair to ensure your locks are well-hydrated and primed for styling.
Step 2: Apply Heat Protectant
This is non-negotiable, folks. Curly hair is prone to damage, so make sure you’re using a good heat protectant before you even think about picking up that blow dryer.
Step 3: Section Your Hair
Divide your hair into manageable sections. I usually go for four sections – two in the front, two in the back.
Step 4: The Blowout
Starting with the back sections, use a round brush to stretch your curls as you blow-dry. The key here is to keep the dryer moving constantly to avoid overheating any one area.
Step 5: Create the Taper
Once your hair is dry and stretched, it’s time to create that taper. If you’re doing this at home, you’ll need some good quality clippers. Start with a longer guard at the top and gradually decrease the length as you move down towards your neckline.
Step 6: Define the Low Fade
The low fade is what gives this style its edge. Use your clippers to create a smooth transition from the longer hair on top to the shorter sides and back.
Step 7: Style and Finish
Finally, use a pomade or styling cream to define your curls and add shine. Remember, a little product goes a long way with curly hair!
Maintaining Your Blowout Low Taper Fade
Congratulations! You’ve achieved the perfect blowout low taper fade. But the work doesn’t stop there. To keep your style looking fresh, you’ll need to:
Frequently Asked Questions
Conclusion
As we wrap up this guide, I want to leave you with one final thought – the blowout low taper fade isn’t just a hairstyle, it’s a statement. It’s a way to celebrate your natural texture while still keeping things fresh and modern.
Remember, mastering this style takes time and patience. Don’t be discouraged if your first attempt doesn’t turn out perfect. Keep practicing, keep experimenting, and most importantly, keep embracing those beautiful curls of yours.